How to Knit a Baby Sweater: Step-by-Step Guide
There’s something almost magical about creating a handmade baby sweater. It’s not just about the finished product—though watching your little one snuggle into something you’ve crafted with your own hands is pretty spectacular. It’s the meditative rhythm of the needles, the satisfaction of watching yarn transform into fabric, and the knowledge that you’re creating a keepsake that’ll be treasured for years to come.
Whether you’re an experienced knitter looking to expand your skills or a complete beginner ready to dive into this rewarding craft, knitting a baby sweater is absolutely achievable. Yes, babies grow faster than you can blink, but that’s exactly why a handmade baby sweater matters—it captures a moment, a season, a phase of their precious early life in something tangible and wearable.
Let’s walk through everything you need to know, from selecting your materials to binding off that final stitch.
Choosing the Right Yarn
The foundation of any successful baby sweater project is selecting appropriate yarn. Baby skin is delicate, so this decision isn’t just about aesthetics—it’s about comfort and practicality.
Fiber content matters tremendously. Merino wool, cashmere blends, and high-quality cotton are excellent choices because they’re soft, breathable, and gentle against sensitive skin. Look for yarn labeled as superwash if you choose wool—this means it can withstand machine washing without felting, which is essential when dealing with baby clothes that inevitably get spit-up, formula, and food on them.
Acrylic yarn might seem budget-friendly, but it tends to pill and doesn’t regulate temperature well for babies. If you’re working within a tight budget, consider a cotton-acrylic blend that offers both affordability and wearability.
Weight matters too. For a baby sweater, you’ll typically want fingering weight (also called sock weight) or sport weight yarn. These create a fabric that’s neither too heavy nor too flimsy—just right for a growing infant who needs mobility and comfort.
Always check that the yarn you choose is suitable for baby clothes in terms of softness rating. Most reputable yarn manufacturers will specify if their yarn is baby-safe.
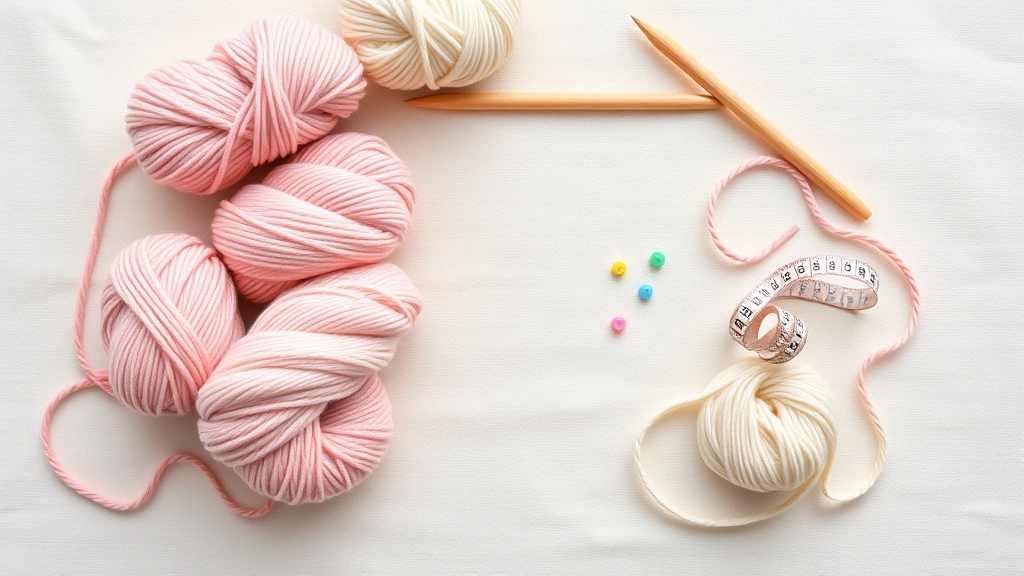
Materials and Tools You’ll Need
Beyond yarn, you’ll need a carefully curated collection of supplies to bring your vision to life.
- Needles: Circular needles (typically US size 4-6 depending on yarn weight) are ideal for baby sweaters since you’ll work in the round for much of the project. Have both the main size and one size smaller for ribbing.
- Stitch markers: These little helpers prevent you from losing your place. Get at least 6-8 for tracking increases and pattern repeats.
- Tapestry needle: Essential for weaving in those pesky yarn ends and seaming pieces together if needed.
- Measuring tape: A soft measuring tape that won’t stretch is crucial for checking gauge and sweater dimensions.
- Yarn bowl or holder: Keeps your yarn from rolling across the floor—a small investment that saves frustration.
- Pattern notes and pencil: Print or write down your pattern, and mark off rows as you complete them.
- Gauge swatch materials: Extra yarn of your chosen color for testing your tension.
The right tools transform knitting from frustrating to genuinely enjoyable. Don’t skimp on needle quality; bamboo or wooden needles provide better grip than metal and prevent stitches from slipping.
Getting Sizing and Measurements Right
This is where many first-time sweater knitters stumble. Baby sizing is notoriously tricky because babies grow at wildly different rates.
Instead of going by age, measure an existing baby garment that fits well. Lay it flat and measure from shoulder to shoulder across the back, then from underarm to underarm. Measure the length from the base of the neck to where you want the sweater to end (typically just covering the diaper area).
Most baby sweaters are designed with generous ease—typically 2-4 inches of extra room built in. This allows for layering, growth, and comfortable movement. A sweater that’s too tight restricts mobility; too loose and it looks sloppy.
When choosing a pattern, look for one that comes in multiple sizes. Newborn, 3-6 months, and 6-12 months are standard increments. If your baby is on the larger side, you might want to knit the 6-month size even if they’re currently newborn-sized.
Consider consulting baby winter essentials guides to understand how your sweater will layer with other clothing.
Selecting Your Pattern
For your first baby sweater, choose a pattern that’s straightforward rather than trendy. Look for patterns with:
- Clear, step-by-step instructions with minimal abbreviations
- Minimal color changes (stranded colorwork adds significant complexity)
- Straightforward shaping without complex decreases
- Good reviews from other knitters (Ravelry is invaluable here)
- A finished object photo that shows the sweater in person, not just a schematic
Top-down patterns are generally easier for beginners because you can try the sweater on as you progress and adjust length accordingly. Seamless patterns are also preferable since they eliminate the need for assembly and seaming.
Websites like Ravelry, PetiteKnit, and Purl Soho offer excellent free patterns specifically designed for babies. Many are written by knitters who deeply understand both the craft and the needs of new parents.
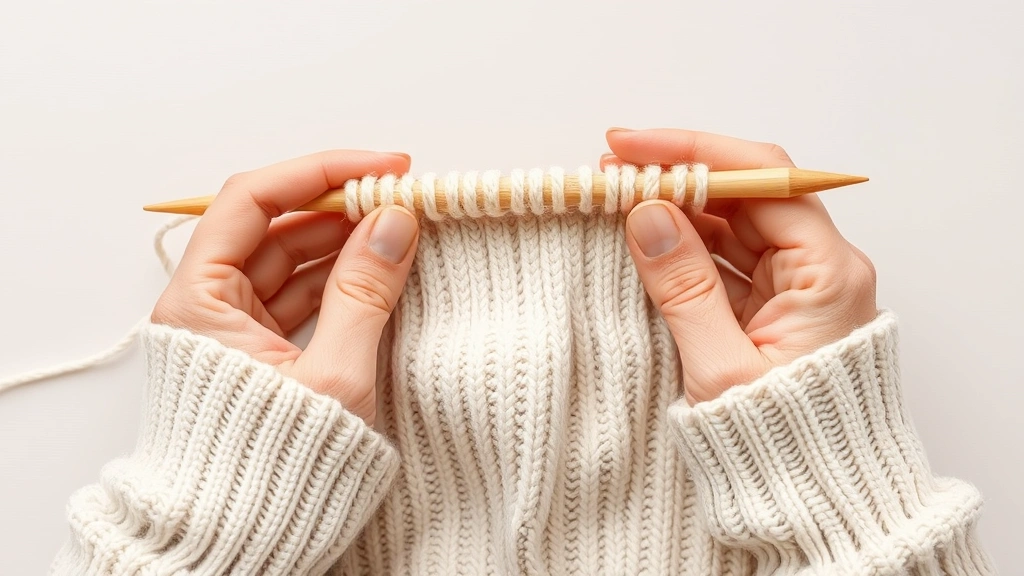
Casting On and Starting
Your cast-on is the foundation of your entire project, so take your time here.
First, knit your gauge swatch. This isn’t optional—it’s the single most important step before beginning. Cast on 24 stitches with your chosen yarn and needles. Knit in stockinette stitch (knit on right side, purl on wrong side) for about 6 inches, then bind off. Wash and dry it the same way you’ll wash the finished sweater. Measure how many stitches and rows you get per inch. If your gauge doesn’t match the pattern, adjust your needle size and try again.
Once gauge is confirmed, use the long-tail cast-on method, which creates a flexible, professional edge. For a baby sweater, you’re typically casting on somewhere between 60-90 stitches depending on size and yarn weight.
Begin with ribbing (usually 1×1 or 2×2 rib) using needles one size smaller than your main needle size. Ribbing typically runs for 1-1.5 inches and provides stretch and shape retention at the hem.
Constructing the Body
Most modern baby sweater patterns use top-down construction, meaning you start at the neck and work downward.
Setting up the neckline: Begin by casting on stitches for the neckline (usually 40-60 stitches). You’ll immediately divide these into front and back sections, placing stitches on holders if needed.
Yoke shaping: The yoke—the area from neck to armhole—requires strategic increases to accommodate the shoulders and upper body. Most patterns use evenly spaced increases every other round. You’ll typically increase 8 stitches per round (2 at each shoulder, 2 at each front edge). Continue until you’ve increased enough to reach your desired bust circumference.
This is where your stitch markers earn their keep. Place markers between each section so you know exactly where your increases go each round.
Dividing for sleeves: Once you’ve completed the yoke, you’ll separate the sleeves from the body. Slip sleeve stitches onto holders or waste yarn, then continue working the body in the round down to your desired length. This typically takes 20-30 rounds depending on the sweater’s length.
When choosing between baby girl clothes and baby boy clothes styles, remember that babies under one year don’t really care about traditional gender styling—focus on comfort and practicality.
Creating Sleeves and Neckline
Sleeves come last in top-down construction, which means you can try the sweater on and adjust length before committing.
Sleeve construction: Pick up stitches around the armhole (typically 40-60 stitches depending on size). Divide these evenly and work in the round. Sleeves require gentle decreases every few rounds to taper from the armhole to the wrist. Most baby sweater patterns decrease 1 stitch at each side of the sleeve every 2-3 rounds.
Work the sleeve until it reaches the wrist, then switch to smaller needles and work 1-1.5 inches of ribbing. Bind off using a stretchy bind-off method (like the Jeny’s surprisingly stretchy bind-off) so the cuff doesn’t restrict circulation.
Neckline finishing: Once the body and sleeves are complete, you’ll pick up stitches around the neck opening and work a few rounds of ribbing. This creates a finished edge that won’t curl and provides a comfortable fit against baby’s neck. You might also add a button band if your pattern includes buttons.
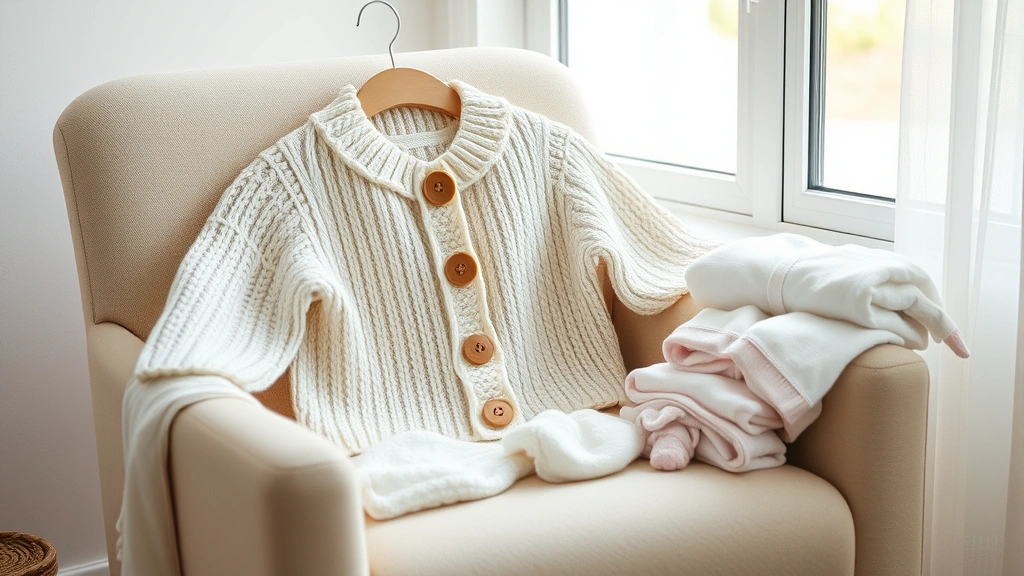
Finishing Touches
The finishing process transforms a collection of stitches into a polished garment.
Weaving in ends: Using your tapestry needle, thread each yarn end through stitches on the wrong side of the fabric, running it along the edge of a color change or along a seam if there is one. Run the end through at least 6 stitches to secure it.
Blocking: This is often skipped but absolutely worth doing. Wet your finished sweater gently in cool water with a touch of wool wash (even acrylic benefits from blocking). Squeeze out water gently—never wring. Lay flat on a clean towel or blocking board, shaping it to your desired measurements. Let dry completely (usually 24 hours).
Blocking evens out tension inconsistencies, smooths ribbing, and gives the sweater a professional appearance. It’s the difference between a handmade sweater and a beautifully crafted handmade sweater.
Final wash: Before gifting or dressing baby in the sweater, give it one final gentle wash to remove any dust from the knitting process. Use cool water and baby-safe detergent.
Check out best baby clothing brands to understand quality standards and care instructions that can inform how you finish and care for your handmade piece.
Common Mistakes to Avoid
Skipping the gauge swatch: This is the number one reason handmade sweaters don’t fit. Yes, it feels like wasted time and yarn, but it’s the cheapest insurance policy you can buy.
Ignoring pattern abbreviations: If you don’t understand an abbreviation, look it up immediately rather than guessing. Five minutes of research prevents twenty minutes of ripping back.
Knitting too tightly: Beginners often knit with tension that’s too tight, which makes the fabric stiff and creates a smaller sweater than intended. Practice relaxing your hands and letting yarn flow more freely.
Not measuring as you go: Periodically try the sweater on a baby or doll to ensure it’s developing correctly. It’s much easier to adjust early than to fix after binding off.
Choosing overly complex patterns: Save the Fair Isle and cable patterns for your fifth sweater. First sweaters should be straightforward so you can focus on proper technique.
Using unsuitable yarn: Scratchy yarn, yarn that doesn’t wash well, or yarn that pills easily will result in a sweater that won’t be worn. Invest in quality.
Frequently Asked Questions
How long does it take to knit a baby sweater?
A straightforward baby sweater typically takes 15-25 hours of active knitting time. This breaks down to about 2-3 weeks if you knit an hour or two daily. More complex patterns or if you’re still building speed can take 4-6 weeks.
What if I make a mistake?
Small mistakes (like a twisted stitch a few rows back) can often be left as-is in handmade pieces—they add character. For significant errors, you can either carefully unknit back to the mistake (tinking) or use a crochet hook to pick up dropped stitches. Watch tutorial videos for these techniques before you need them.
Can I use any yarn for a baby sweater?
Not really. Avoid scratchy wools, yarns with loose fibers that shed, and anything with loose dyes that might stain baby’s skin. Always choose yarn specifically labeled as suitable for babies or with high softness ratings. According to the American Academy of Pediatrics, baby clothing should be gentle and breathable.
Should I add buttons or a zipper?
For babies under 12 months, closures aren’t necessary and can actually be safety hazards. Pullover sweaters are safest. If you want to add buttons later (for older toddlers), ensure they’re securely sewn and age-appropriate.
How do I wash a handmade baby sweater?
Follow your yarn’s care instructions, but generally use cool water and gentle baby detergent. Lay flat to dry. Never machine wash wool unless it’s explicitly superwash-treated. For everyday wear, hand washing is the safest method.
What’s the best size to knit for a newborn?
Many knitters recommend knitting in the 3-6 month size even for newborns because babies grow so quickly. Your newborn will wear the sweater for only a few weeks otherwise. However, if you want newborn photos in the sweater, go ahead and make a newborn size—just plan to make a 3-6 month size later.
Can I sell baby sweaters I knit?
Yes, if you’ve designed them yourself or adapted patterns significantly. If you’re selling sweaters made from published patterns, check the pattern’s terms. Many designers allow handmade sales but prohibit mass production. Always credit the designer and follow their licensing terms.
What resources help me improve my knitting skills?
Websites like Ravelry connect you with millions of knitters and provide forums for troubleshooting. YouTube channels dedicated to knitting techniques are invaluable for visual learners. Local yarn shops often offer classes for in-person instruction. Books like “The Knitter’s Book of Knowledge” by Debbie Bliss provide comprehensive technique reference.
What if the sweater doesn’t fit?
Babies grow unpredictably, so this happens often. If it’s slightly large, baby will grow into it—that’s actually ideal since you want multiple wears from your effort. If it’s too small, consider unraveling and reknitting in a larger size, or save it for a smaller baby or doll.