How to Crochet a Baby Blanket: Expert Guide
There’s something genuinely magical about creating a handmade baby blanket. It’s not just about the finished product—though that soft, cozy creation is undeniably beautiful—it’s about the intention behind every stitch. Whether you’re preparing for a new arrival, looking for a meaningful baby shower gift, or simply want to explore a relaxing creative hobby, crocheting a baby blanket offers the perfect blend of accomplishment and mindfulness.
The wonderful part? You don’t need to be an experienced crocheter to pull this off. With the right guidance, materials, and a bit of patience, even beginners can create a blanket that becomes a cherished keepsake. We’re talking about something that might wrap a newborn for years to come, or become the perfect addition to a nursery that grows with your child.
This comprehensive guide walks you through everything from selecting the ideal yarn to mastering the stitches that make baby blankets so special. Let’s dive in.
Choosing the Perfect Yarn for Baby Blankets
The foundation of any successful baby blanket project starts with selecting appropriate yarn. This isn’t just about picking something pretty—baby skin is sensitive, and the yarn you choose directly impacts comfort and safety.
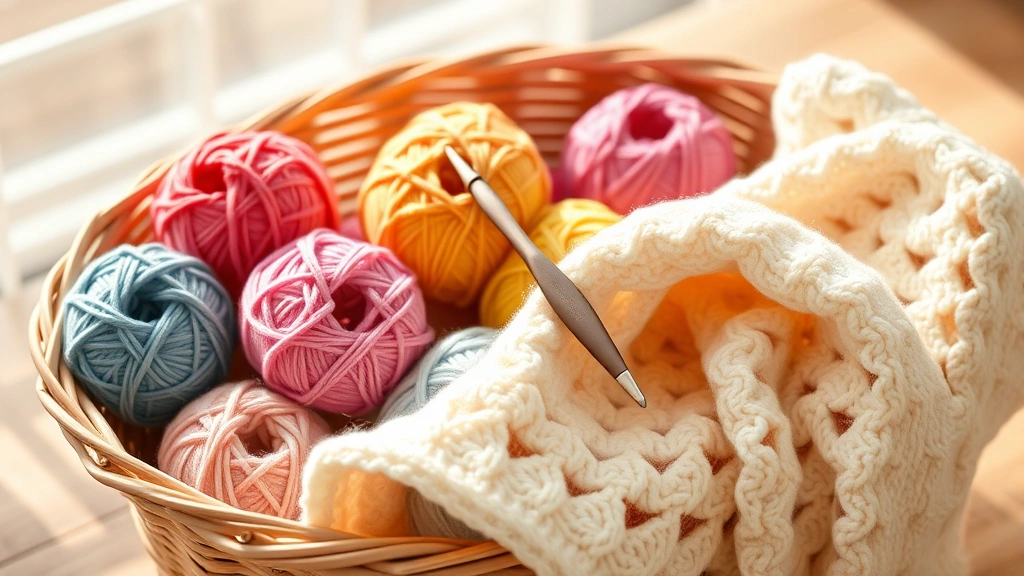
Softness matters most. Look for yarns specifically designed for babies. Bernat Baby Blanket Yarn has earned its reputation among crocheters for its incredibly soft texture and forgiving nature. It’s thick, plush, and creates a blanket quickly, which appeals to both beginners and experienced makers.
When shopping for yarn, consider these factors:
- Fiber content: Cotton, bamboo blends, or acrylic baby yarns are excellent choices. Avoid anything scratchy or with loose fibers that could irritate delicate skin.
- Weight and texture: Baby yarns typically range from light worsted to bulky weight. Thicker yarns work up faster and are more forgiving for beginners.
- Washability: Choose machine-washable options. Babies generate spills, spit-ups, and accidents—your blanket needs to withstand frequent washing.
- Hypoallergenic properties: Look for yarns free from dyes and chemicals. Some babies have sensitive skin, and hypoallergenic options minimize irritation risks.
Budget-conscious crafters appreciate acrylic baby yarns for their affordability and durability. Premium options include merino wool blends or organic cotton, though these come at a higher price point. The good news? Even mid-range baby yarns create beautiful, functional blankets.
Essential Tools and Supplies
Beyond yarn, you’ll need surprisingly few items to get started. Here’s your complete toolkit:
- Crochet hooks: Match your hook size to your yarn weight. Most baby blanket projects use sizes F (3.75mm) through K (6.5mm). Having one or two hook sizes is sufficient.
- Scissors: Sharp, dedicated craft scissors make cutting yarn clean and easy.
- Yarn needle: Also called a tapestry needle, this helps weave in loose ends and seam pieces together if needed.
- Stitch markers: Simple clips or even bobby pins help you track your place in patterns.
- Pattern: Choose from free online resources, books, or purchase digital patterns. We’ll discuss specific patterns shortly.
- Measuring tape: Essential for checking your blanket dimensions as you work.
Optional but helpful supplies include a yarn bowl (keeps yarn from rolling away) and a project bag for portability. Many crocheters work on blankets during downtime—commutes, waiting rooms, or while watching television—so something transportable is genuinely convenient.
Determining the Right Blanket Size
Before you start crocheting, you need to know your target dimensions. Baby blanket sizes vary depending on purpose and preference, but standard measurements provide a good starting point.
Common baby blanket dimensions include:
- Crib blankets: Approximately 28 x 34 inches. Perfect for draping over crib railings or for tummy time.
- Stroller blankets: Around 24 x 30 inches. Portable and ideal for outings.
- Play mats: Roughly 36 x 36 inches or larger. Great for floor play as baby grows.
- Receiving blankets: Typically 30 x 40 inches. Traditional and versatile.
Your choice depends on intended use. A baby blanket meant for regular use should be durable and appropriately sized for frequent washing. If you’re considering personalized baby blankets, larger dimensions give you more space for creative additions like embroidered initials or appliqués.
Here’s a practical tip: calculate yardage needed before purchasing yarn. Most patterns specify yardage requirements. If you’re designing your own blanket, plan for approximately 1,000 to 2,000 yards depending on size and stitch density. Bulky yarns require less yardage than lighter weights for the same finished size.
Beginner-Friendly Crochet Patterns
Choosing the right pattern makes or breaks your experience. Beginners benefit from patterns using basic stitches and minimal shaping.
Single crochet blankets: The most straightforward option. Single crochet creates a tight, durable fabric perfect for blankets. While they work up slowly compared to other stitches, the learning curve is minimal. Ideal for absolute beginners.
Double crochet blankets: Slightly faster than single crochet while remaining accessible to beginners. Double crochet creates a more drape-y fabric. Many popular baby blanket patterns use this stitch as their foundation.
Half double crochet: A middle ground offering reasonable speed and simplicity. Half double crochet creates a medium-weight fabric suitable for various climates.
Granny square blankets: These involve crocheting individual squares, then joining them together. They’re excellent for beginners because you can work on small sections, making projects feel less overwhelming. Plus, if you make a mistake in one square, you only need to redo that section.
Moss stitch or seed stitch: Simple alternating patterns that look textured and interesting while using just basic stitches. Perfect for creating visual interest without complexity.
Avoid patterns with:
- Complex color changes or intarsia work
- Frequent stitch type variations
- Intricate shaping or decreases
- Detailed edgings requiring advanced techniques
Resources like Ravelry.com offer thousands of patterns with difficulty ratings. Filter by “beginner” and read reviews from other crafters before committing.
Step-by-Step Instructions
Step 1: Gather and organize materials. Lay out your yarn, hook, scissors, yarn needle, and pattern. Ensure good lighting—this prevents mistakes and reduces eye strain. Wind your yarn into a ball if it’s in a skein; this prevents tangling as you work.
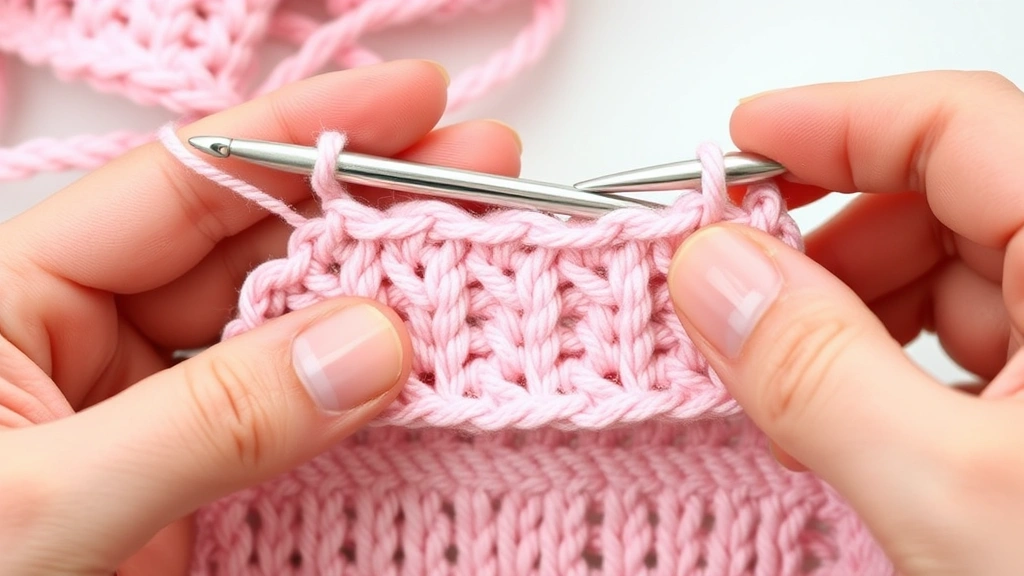
Step 2: Practice basic stitches. Before starting your actual blanket, practice chain stitches, single crochet, and double crochet on scrap yarn. Consistency in tension and stitch size matters tremendously. Spend 30 minutes getting comfortable with your hook and yarn combination.
Step 3: Create your foundation chain. This is your starting point. Most patterns specify exactly how many chains to make. Count carefully—miscounting here creates problems throughout your project. Use stitch markers to count every tenth chain for accuracy.
Step 4: Work your first row. Follow your pattern precisely for the first few rows. This establishes your pattern’s structure and rhythm. Once you understand the pattern repeat, subsequent rows become automatic.
Step 5: Maintain consistent tension. This is crucial for even-looking blankets. Tension refers to how tightly you hold yarn while crocheting. Too tight creates stiff, puckered fabric; too loose creates floppy, inconsistent stitches. Most crocheters naturally find their rhythm after a few rows.
Step 6: Work until desired length. Measure your blanket every few rows using your measuring tape. Crochet work can stretch, so measure while the blanket lies flat. Continue until you reach your target dimensions.
Step 7: Bind off properly. Cut your yarn, leaving a 6-inch tail. Pull the tail through your final loop and tighten. This secures your work and prevents unraveling.
Step 8: Weave in ends. Thread your yarn needle with each loose yarn tail. Weave the needle through nearby stitches, then trim excess yarn. This finishing step prevents fraying and creates a polished appearance.
Finishing Touches and Care
The blanket is technically complete after binding off, but finishing touches elevate it from handmade to heirloom-quality.
Edging options: Consider adding a simple border using single crochet or a contrasting yarn color. This frames your blanket beautifully and reinforces edges. Single crochet edging prevents curling, which naturally occurs on blanket edges.
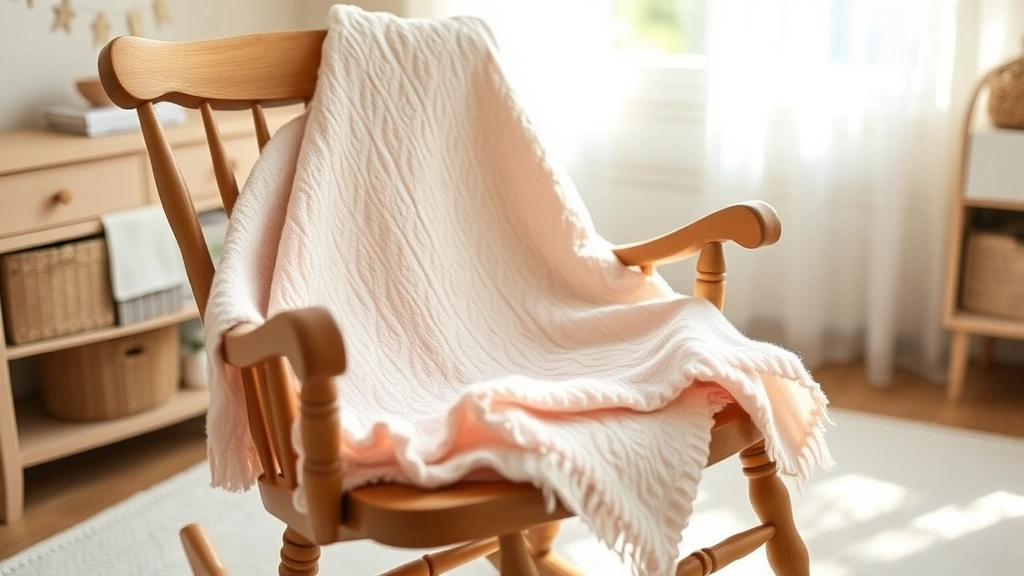
Blocking: Wet blocking shapes your blanket and evens out stitches. Soak your blanket in cool water with gentle detergent, squeeze out excess water without wringing, then pin it to shape on a blocking mat. Allow it to dry completely. This step transforms an okay blanket into a professional-looking one.
Personalization: Embroidered initials, appliqué designs, or ribbon details make your blanket uniquely special. If gifting, consider adding a name or birth date. This transforms your blanket into a meaningful keepsake that parents treasure.
Care instructions: Create a simple tag or card explaining how to care for the blanket. Include washing instructions, drying recommendations, and any special considerations. This ensures the blanket remains beautiful for years.
For gift-giving occasions, your handmade blanket pairs perfectly with other baby shower gift ideas or items from a baby registry must haves list. The personal touch of a handmade blanket complements store-bought essentials beautifully.
Washing and maintenance: Most baby blankets should be washed in cool or warm water with gentle detergent. Avoid bleach and fabric softener, which can irritate sensitive skin. Dry on low heat or air dry to prevent shrinkage. Check your specific yarn’s care instructions, as some materials have unique requirements.
Frequently Asked Questions
How long does it take to crochet a baby blanket?
Timeline depends on pattern complexity, yarn weight, and your experience level. A simple double crochet blanket using bulky yarn might take 10-20 hours of active crocheting. More intricate patterns could require 30-50+ hours. Most crafters work on projects over several weeks, dedicating a few hours weekly.
What’s the best yarn for a baby with sensitive skin?
Organic cotton, bamboo blends, and hypoallergenic acrylic specifically labeled for babies are excellent choices. Avoid fuzzy yarns or those with loose fibers. Test yarn by rubbing it against your own skin—if it feels scratchy to you, it will likely irritate a baby’s delicate skin.
Can I use regular yarn instead of baby yarn?
While technically possible, it’s not ideal. Regular yarn often contains dyes and finishes that irritate sensitive skin. Baby yarns are specifically treated to be soft and safe. The minimal cost difference makes choosing appropriate yarn worthwhile.
What if I make a mistake in my pattern?
Small mistakes in tension or occasional stitch variations rarely matter in baby blankets. The handmade quality actually adds charm. If you notice a significant error several rows back, you can unravel (called “frogging”) back to the mistake and redo those rows. This sounds daunting but becomes easier with practice.
Is crochet or knitting better for baby blankets?
Both create beautiful baby blankets. Crochet offers advantages: it’s more forgiving of mistakes, works up faster, and uses heavier yarn typically. Parents Magazine offers comprehensive guidance on blanket selection and creation methods. Choose whichever craft appeals to you most—the best blanket is one made with love and attention.
Can I add decorative elements like appliqués?
Absolutely. Appliqués, embroidery, or crocheted flowers add visual interest and personalization. Just ensure all elements are securely attached and use baby-safe materials. Avoid small pieces that could pose choking hazards.
How do I ensure my blanket is the right size?
Measure your blanket every 5-10 rows using a measuring tape. Crochet can stretch, so measure while the blanket lies flat on a table. Compare your measurements to your target dimensions. This prevents finishing a blanket that’s significantly too large or small.
Should I pre-wash the blanket before gifting?
Pre-washing removes excess dyes and finishes, which is thoughtful for sensitive skin. Wash once in gentle detergent, then dry. Include care instructions with your gift so parents can maintain it properly.