How to Draw a Baby: Step-by-Step Guide for Parents and Artists
There’s something magical about capturing the innocence and charm of a baby on paper. Whether you’re creating a personalized illustration for a baby shower card message, designing a custom cover for a baby book, or simply exploring your artistic side, learning to draw a baby is a rewarding skill that doesn’t require years of art school.
Drawing babies presents unique challenges—their proportions differ dramatically from adults, their features are delicate, and capturing that precious quality requires understanding both anatomy and emotion. But here’s the good news: with the right approach and some practice, you’ll be creating adorable baby illustrations that make hearts melt.
This guide walks you through the fundamentals of baby drawing, from basic proportions to adding personality and life to your sketches. Whether you’re an experienced artist branching into portraiture or a parent wanting to create meaningful keepsakes, you’ll find practical techniques that work.
Understanding Baby Proportions and Anatomy
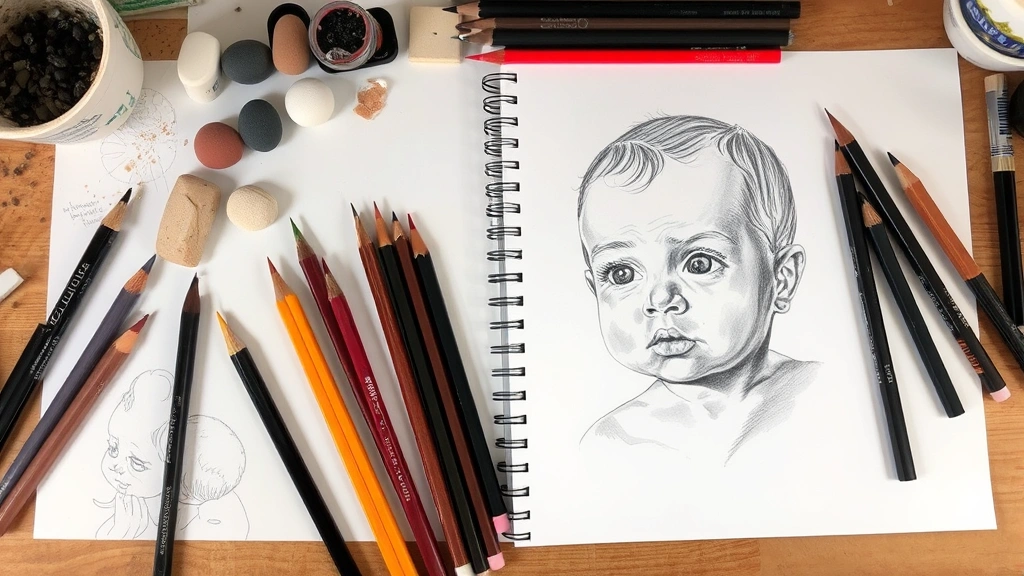
Before you put pencil to paper, understanding how babies actually look is crucial. Newborns and infants have dramatically different proportions than older children and adults. Their heads are proportionally larger—roughly one-quarter of their total body length, compared to one-eighth for adults. This oversized head is one of the most distinctive features that makes baby drawings instantly recognizable.
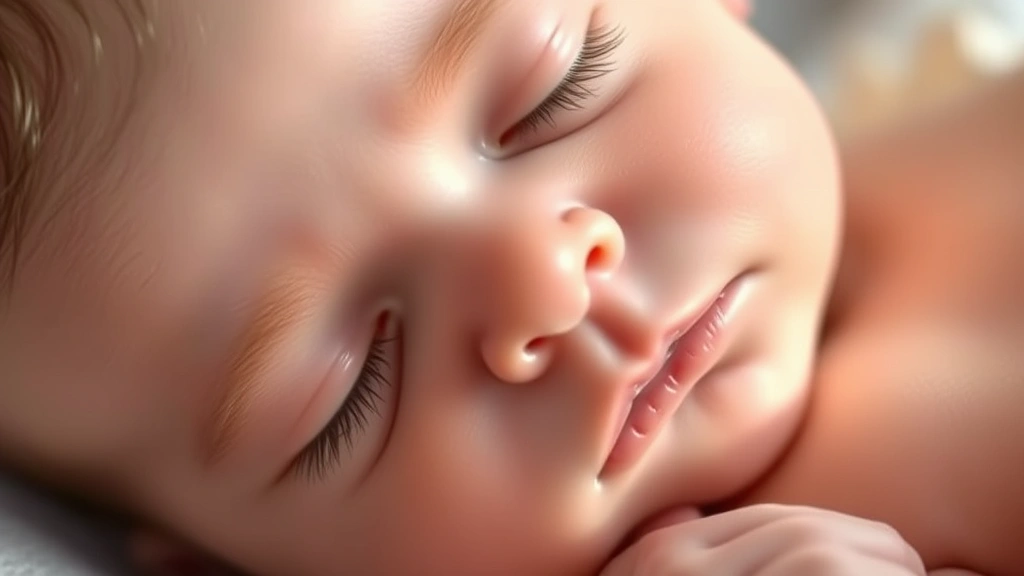
The face itself requires careful observation. Baby faces are rounder, with fuller cheeks and a smaller chin. Their eyes are larger and positioned lower on the face than you might expect. The distance between the eyes is typically wider than an adult’s, and they sit higher up, leaving more space below the nose and mouth. According to the American Academy of Pediatrics, understanding infant facial development helps artists capture authentic expressions.
Babies have minimal facial definition—their noses are small and button-like, their lips are fuller and softer, and they lack the sharp angles and defined features of older subjects. The ears are positioned more toward the back and side of the head, and they’re proportionally larger than adult ears. These subtle differences are what separate a baby drawing from simply drawing a small adult.
The body is also distinct. Baby arms and legs are shorter and chubbier, with natural rolls and dimples at the joints. Their hands and feet are disproportionately small, and they typically maintain a slight curve or slouch rather than standing upright with adult posture.
Essential Materials and Tools
You don’t need an expensive art supply store’s entire inventory to draw babies effectively. Start with the basics and expand as your skills develop.
- Pencils: Invest in a range from HB to 4H for sketching and lighter lines, and B to 6B for darker shading. An HB pencil is perfect for initial outlines.
- Paper: Medium-weight sketch paper (around 90 gsm) works well for practice. For finished pieces, consider heavier paper that can handle erasing and blending without tearing.
- Erasers: A kneaded eraser is invaluable for gentle corrections and lifting highlights. A regular vinyl eraser works for more aggressive erasing.
- Blending tools: Blending stumps, tortillons, or even a tissue can smooth pencil marks and create soft transitions—essential for baby skin.
- Sharpener: Keep your pencils sharp for detail work, but not so sharp they break easily. A quality handheld sharpener is sufficient.
- Ruler: Helpful for establishing proportions and guidelines, though not essential once you develop confidence.
Optional but worthwhile additions include colored pencils if you want to add warmth to skin tones, a blending stump set for more control, and fixative spray to protect finished pieces. Many artists find that limiting their palette forces them to focus on fundamentals rather than getting distracted by materials.
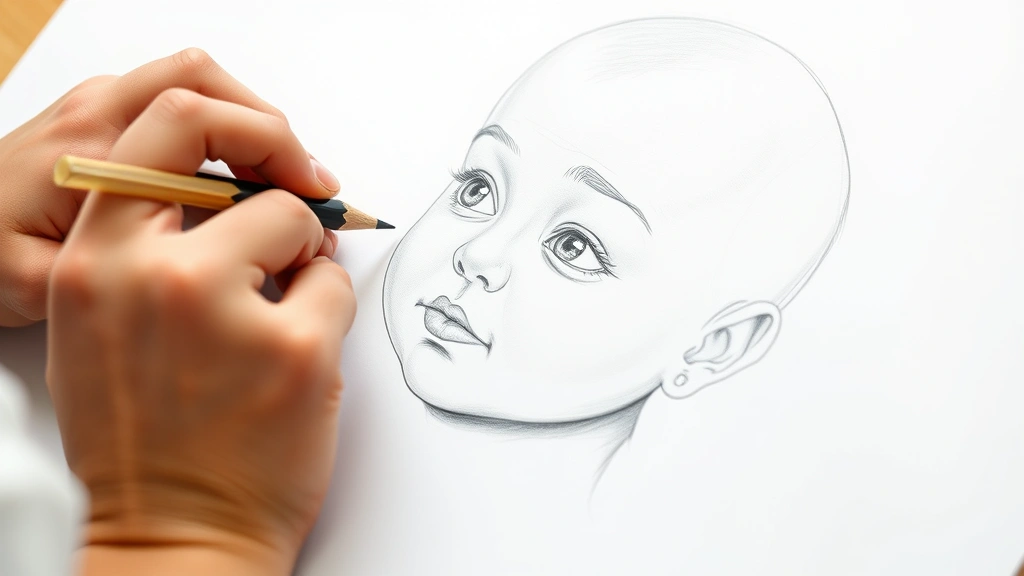
Drawing the Basic Head Shape
Start light. Seriously—use barely any pressure on your pencil. You’ll be adjusting proportions and may erase multiple times before getting it right, so a light touch saves your paper and frustration.
Begin with a circle for the cranium (the upper part of the head). This circle should be relatively large and represent the brain case. Below this, add a smaller, slightly narrower shape for the face. Think of it as a circle with a gently tapered chin rather than a sharp point. The overall silhouette should feel rounded and soft, not angular.
Draw a light horizontal line through the middle of the head—this is your eye line. In babies, this line sits closer to the top of the head than in adults. Below that, add another line roughly one-third down from the eye line; this indicates where the nose base sits. A final line, positioned about one-third of the way between the nose line and the chin, marks the mouth.
These guidelines might seem excessive, but they’re the difference between a baby that looks three years old and one that looks three months old. The spacing is everything. Check your proportions against reference images before moving forward. Even professional artists use guidelines—it’s not cheating; it’s working smart.
Positioning Eyes, Nose, and Mouth
Eyes are the soul of any portrait, but baby eyes have specific characteristics. They’re larger than adult eyes, with more visible white space around the iris. The pupils should be positioned slightly toward the inner corner of each eye rather than perfectly centered.
Draw the eyes on your eye line, ensuring they’re equidistant from the center of the face. The distance between the two eyes should roughly equal the width of one eye. Baby eyes have a slight upward tilt at the outer corners—not extreme, just a gentle lift that contributes to that innocent expression.
Add eyebrows above the eyes, keeping them soft and barely defined. Babies don’t have dramatic eyebrows; theirs are light and delicate. Include eyelashes, but resist the temptation to make them heavy or dramatic. A few gentle strokes on the upper lid create the right effect.
The nose is small and simple. Rather than drawing nostrils, suggest them with barely-there shadows or tiny dots. A subtle curved line for the bridge of the nose and perhaps a small shadow beneath convey the nose’s presence without overemphasizing it. Baby noses are more about suggestion than definition.
For the mouth, draw a soft curved line for the upper lip and a slightly fuller curve for the lower lip. Babies’ mouths are generous and expressive. If drawing a smile, make it genuine—a slight upward curve at the corners of the mouth and a gentle fullness to the lips. Avoid making the mouth too wide; it should fit proportionally within the face.
Add a subtle shadow beneath the lower lip to show dimension, and perhaps a tiny highlight on the upper lip to suggest moisture and softness. These small touches make an enormous difference in capturing that baby quality.
Adding Hair and Details
Baby hair varies enormously—from bald to full heads of hair, from wispy fine strands to thick waves. The key is understanding that baby hair is typically softer and finer than adult hair, even when they have a full head.
Rather than drawing individual strands, suggest hair direction and texture with light, flowing lines that follow the natural growth pattern. For fine baby hair, use very light pencil strokes that create the impression of hair without harsh definition. Leave areas of negative space (the paper showing through) to suggest the soft, airy quality.
If drawing a bald or mostly bald baby, the scalp should have subtle contours and shadows that follow the skull’s shape. A tiny shadow beneath the hairline and light shading across the scalp creates dimension without looking artificial.
Add finishing details thoughtfully: small dimples on the cheeks, a slight shadow under the chin for neck definition, and soft shading in the hollows of the cheeks to suggest the baby’s delicate bone structure. These details separate a sketch from a finished portrait.
Drawing the Body and Pose
Once you’ve mastered the head, the body becomes the context for your composition. Baby bodies are chubby and rounded, with natural curves at every joint. Unlike adult anatomy where muscles create definition, baby bodies have soft rolls and dimples.
Start with a simple curved line for the spine to establish the baby’s posture. Babies rarely stand ramrod straight; they slouch slightly or lean forward. This natural curve is part of what makes them visually appealing and recognizable.
Draw the shoulders as gentle slopes rather than sharp angles. Babies’ shoulders are narrower and rounder than adults’. The torso is relatively short compared to the head, and the belly naturally protrudes slightly—this is normal infant anatomy, not something to minimize.
Arms and legs are shorter and chubbier, with a slight bend rather than being stick-straight. Hands and feet should be drawn small and delicate, with minimal detail. A few gentle lines suggesting fingers and toes suffice; overdoing hand and foot details draws attention away from the face.
Consider the pose carefully. Is the baby sitting, lying down, or being held? Each pose tells a different story. A sleeping baby conveys peace and innocence. A baby reaching toward something suggests curiosity and development. A baby being cradled emphasizes the bond between parent and child—perfect if you’re creating a special piece for personalized baby blankets or nursery art.
Clothing can add character without overwhelming the composition. Simple garments like onesies or soft sweaters work well. You might even incorporate elements like a baby alive doll or favorite toy in the composition to make the drawing more personal and meaningful.
Shading Techniques for Dimension
Shading transforms a flat sketch into a three-dimensional portrait. For babies, soft, subtle shading works best—harsh shadows contradict the delicate quality you’re after.
Begin by identifying your light source. Decide which direction light is coming from, then shade accordingly. For baby skin, use light layers of shading rather than heavy, dark tones. Build up gradually, as it’s easier to add more shading than to remove it.
The cheeks are a natural focal point for soft shading. A gentle shadow on the underside of the cheek, combined with perhaps a rosy tone if using colored pencils, creates the characteristic baby roundness. The hollows of the cheeks should be barely suggested—too much shadow makes the baby look gaunt or ill.
Shade beneath the chin, along the neck, and where the head meets the shoulders to establish spatial relationships. Use shadows to suggest the eye sockets without making them look sunken. A tiny shadow beneath the lower lip and a subtle shadow at the base of the nose provide definition without harshness.
For the hair, use directional shading that follows the hair’s growth pattern and creates texture. Leave highlights—areas of white paper or very light shading—to suggest shine and softness. Blending is your friend here; use a blending stump or tissue to soften harsh pencil marks and create smooth transitions.
The body should have even softer shading than the face. Suggest the roundness of the belly and the chubby rolls at joints with the lightest possible shading. The goal is dimension and form, not dramatic contrast.
Common Mistakes to Avoid
Even experienced artists fall into traps when drawing babies. Being aware of these pitfalls helps you sidestep them.
Mistake 1: Eyes Too Small or Positioned Incorrectly – This is the number one baby-drawing killer. Baby eyes must be larger and positioned higher on the face than your instincts suggest. Reference photos constantly until this becomes intuitive.
Mistake 2: Head Too Small – Beginners often draw heads that are too proportional to the body. Remember: a baby’s head should be roughly one-quarter of the total body length. Go bigger.
Mistake 3: Overdoing Details – Babies have soft, simple features. Overworking the drawing with excessive shading, too many eyelashes, or heavily defined eyebrows makes them look older or artificial. Restraint is powerful.
Mistake 4: Harsh Shadows – Baby skin is soft and luminous. Harsh shadows and dark tones contradict this quality. Keep shading subtle and build gradually.
Mistake 5: Ignoring the Neck – Many beginner drawings lack a proper connection between head and body. The neck establishes spatial relationships and prevents the head from looking pasted on. Include it.
Mistake 6: Forgetting the Ears – Ears are easy to overlook, but they’re important for proportion and realism. Position them correctly on the sides of the head, roughly between the eye line and the nose line.
Mistake 7: Making the Mouth Too Serious – Babies typically have soft, gentle expressions. A mouth that’s too wide, too detailed, or too serious ages the baby instantly. Keep it simple and sweet.
Reference images are invaluable. Whether you’re drawing from a personal photo or using images from reputable sources, constant comparison helps you catch mistakes before they become embedded in your drawing.
For additional guidance on child development and understanding how babies grow and change, the CDC’s milestone tracking resource offers insights into infant development that can inform your artistic choices.
Frequently Asked Questions
What age baby should I draw?
Newborns and babies under six months are popular choices because their features are more delicate and distinctive. However, babies of any age make wonderful subjects. Consider what resonates with you—the vulnerability of a newborn, the developing personality of a three-month-old, or the interactive nature of a six-month-old.
Should I draw from photographs or real life?
Photographs are invaluable, especially when starting. They freeze the moment, allowing you to study proportions and expressions without a moving target. Once comfortable with the fundamentals, drawing from life develops your observational skills. Many artists combine both approaches.
How long does it typically take to draw a baby?
A basic sketch might take 30 minutes to an hour. A detailed, shaded portrait typically requires 2-4 hours, depending on complexity and your experience level. Don’t rush—the time invested in careful observation and gradual building pays dividends in the final piece.
Can I use these techniques with digital art?
Absolutely. The principles of proportion, placement, and shading translate directly to digital drawing. The advantage of digital art is the ability to adjust and experiment without fear of permanent mistakes. Many professional baby portrait artists work digitally.
What if my first attempts don’t look like a baby?
That’s completely normal. Baby drawing is deceptively challenging because the margin for error is small—slight adjustments in eye position or head shape dramatically change the result. Keep practicing, reference photos constantly, and don’t erase your early attempts. Reviewing your progress is motivating and educational.
How can I add personality to my baby drawings?
Expression is everything. A slight smile, the direction of the gaze, the angle of the head—these elements convey personality. Consider what story you want to tell. Is the baby curious, peaceful, playful? Pose and expression should align with that narrative. You might even incorporate meaningful elements like their favorite toy or baby girl clothes they wear often to personalize the piece further.
Are there specific resources for learning baby portraiture?
Parents Magazine and other parenting resources often feature articles on creative projects involving babies. Additionally, online art communities and platforms offer tutorials specifically focused on portrait drawing and infant anatomy.
Learning to draw a baby is a journey that combines technical skill with emotional understanding. You’re not just capturing likeness; you’re preserving innocence, wonder, and the fleeting moments of early childhood. Each drawing you complete builds your confidence and deepens your connection to this rewarding artistic pursuit. Start today, practice consistently, and soon you’ll be creating baby portraits that make hearts melt.