How to Knit Baby Booties: A Step-by-Step Guide for New Parents
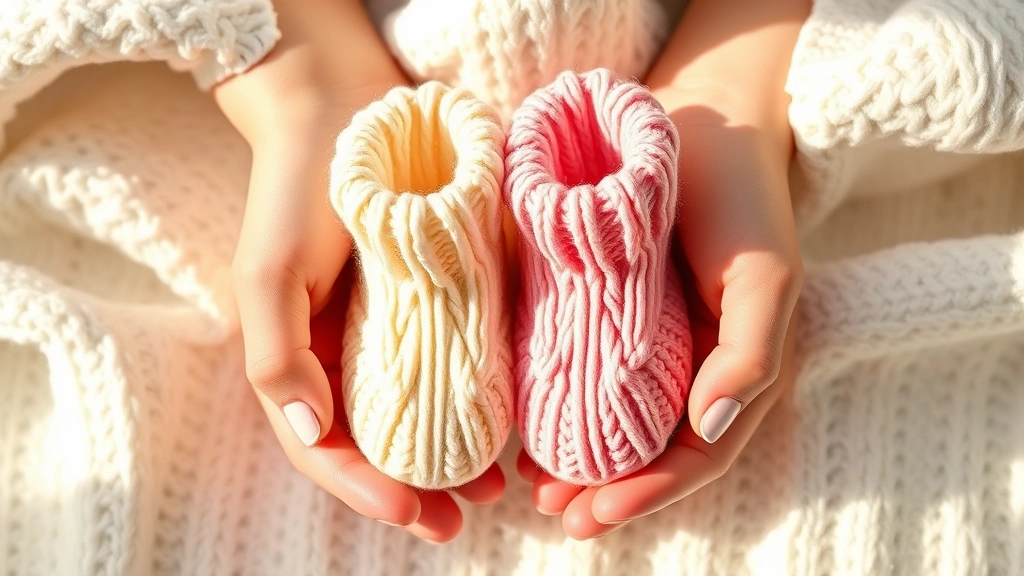
There’s something profoundly special about creating handmade items for your little one. When you knit baby booties with your own hands, you’re not just crafting a piece of clothing—you’re stitching together love, patience, and countless hours of intention. Whether you’re an experienced knitter looking for a new project or a beginner wanting to create something meaningful for your nursery, baby booties offer the perfect balance of manageable complexity and heartwarming results.
Baby booties have been cherished by families for generations, and it’s easy to see why. They’re adorable, practical, and deeply personal in a way that store-bought alternatives simply can’t match. Plus, they make incredible gifts for baby showers, new parent celebrations, or simply as a keepsake you’ll treasure long after your child outgrows them.
In this comprehensive guide, we’ll walk you through everything you need to know about knitting baby booties—from selecting the right materials to mastering the final stitches. By the end, you’ll have the confidence and knowledge to create beautiful booties that your baby will actually want to wear.
Essential Materials and Tools
Before you cast on your first stitch, gather everything you’ll need. Having the right tools makes the entire process smoother and more enjoyable. You’ll need knitting needles in the appropriate size for your yarn—typically US sizes 1-4 for baby booties. A yarn needle (also called a tapestry needle) helps you weave in ends and seam pieces together. Small stitch markers keep you on track throughout your project, and a measuring tape ensures your booties fit properly.
Quality matters when it comes to needles. Bamboo needles offer excellent grip and prevent stitches from slipping, making them ideal for beginners. Metal needles work faster for experienced knitters but can feel slippery at first. Most importantly, have scissors, a notebook for tracking rows, and good lighting—your eyes will thank you during those intricate sections.
Consider keeping a pattern book nearby. Resources like Ravelry and knitting community forums provide free patterns and troubleshooting tips from thousands of knitters worldwide. Don’t underestimate the value of having experienced knitters just a message away.
Choosing the Right Yarn
The yarn you select dramatically impacts both the appearance and wearability of your baby booties. For newborns and infants, prioritize softness above all else. Merino wool, cashmere blends, and quality acrylic yarns are excellent choices because they’re gentle against delicate skin. Weight matters too—baby booties work best with fingering weight or sport weight yarn, which creates a dense, durable fabric that holds its shape.
Think about fiber content carefully. Pure wool provides excellent insulation and naturally regulates temperature, but some babies have sensitive skin. Superwash wool eliminates the itchiness of traditional wool while maintaining its benefits. If you’re concerned about allergies, the American Academy of Pediatrics suggests consulting with your pediatrician about yarn fiber choices for sensitive infants.
Color selection is where your personality shines. Soft pastels create a classic, timeless look, while bright jewel tones add personality. Variegated yarns can hide minor mistakes and add visual interest, though solid colors showcase your stitch work beautifully. Purchase slightly more yarn than your pattern calls for—approximately 10-15% extra—to account for gauge adjustments and practice swatches.
Sizing and Measurements
Getting the size right is crucial. Baby booties should fit snugly without restricting circulation, and they’ll be worn over socks, so account for that extra layer. Newborn booties typically measure 3-4 inches in length, while 3-6 month sizes run 4-4.5 inches. If you’re knitting for a specific baby, measure their foot length gently with a soft measuring tape.
Most patterns provide a finished measurement, which is essential information. If you’re creating baby boy shoes or baby girl clothes, remember that infants’ feet grow rapidly—sometimes an inch in just a few months. Designing booties with a slightly looser fit around the ankle allows for growth and prevents the frustration of creating something your baby outgrows immediately.
Gauge is your secret weapon for accurate sizing. Before starting your project, knit a small sample swatch using your chosen yarn and needles. Measure it carefully after washing and drying to see how your yarn behaves. A difference of just one stitch per inch can throw off your entire bootie size, so don’t skip this step.
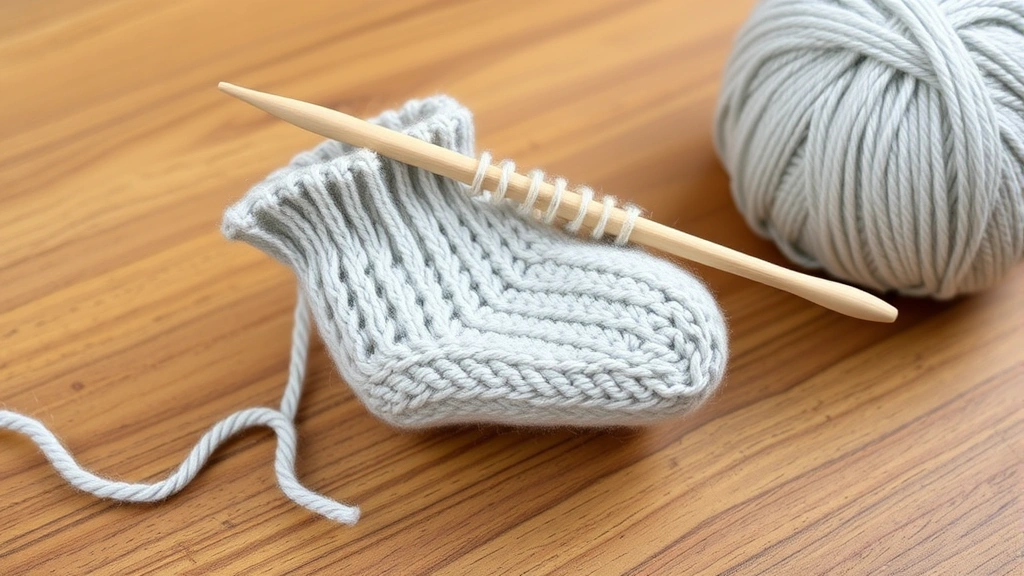
Getting Started: Basic Techniques
If you’re new to knitting, understanding fundamental techniques makes everything else easier. The long-tail cast-on is perfect for baby booties because it creates a neat, elastic edge. Practice this technique several times before starting your project. Your cast-on stitches are literally the foundation—they set the tone for your entire bootie.
Familiarize yourself with basic stitches: knit, purl, and yarn over. Most baby bootie patterns use primarily knit and purl stitches arranged in different combinations to create texture and interest. Ribbing—alternating knit and purl stitches—creates stretchy cuffs that stay on tiny feet. Garter stitch (knitting every row) creates a thick, squishy fabric perfect for soles.
Understanding increases and decreases is essential. You’ll use these techniques to shape the bootie from the cuff down to the toe. Knit front and back (KFB) is a common increase, while knit two together (K2tog) decreases stitches. These shaping techniques transform flat fabric into three-dimensional booties. Practice these on scrap yarn until your hands understand the motions instinctively.
Step-by-Step Instructions
Step 1: Cast On and Create the Cuff
Begin by casting on 28-32 stitches (the exact number depends on your pattern and gauge). For most baby bootie patterns, you’ll cast on using the long-tail method, which creates a professional-looking edge. Work in ribbing—typically K2, P2 (knit 2, purl 2)—for 8-10 rows. This creates the elastic cuff that keeps the bootie on your baby’s foot. The ribbing should feel snug but not constrictive.
Step 2: Establish the Main Body
Switch to stockinette stitch (knit on right side, purl on wrong side) or your pattern’s specified stitch pattern. Work even rows without increasing or decreasing for 12-16 rows, depending on your baby’s foot size. This creates the instep portion of the bootie. Your fabric should feel smooth and drape nicely at this stage. Count your rows carefully—consistency here ensures both booties match in size and appearance.
Step 3: Shape the Heel
The heel is where your bootie transforms from flat fabric into a three-dimensional form. Most patterns use short rows to create this shaping. You’ll knit partway across your row, then turn and work back in the opposite direction, gradually working more stitches into each row. This creates a gentle curve that cradles your baby’s heel perfectly. Work 8-10 short rows, depending on your pattern specifications.
Step 4: Pick Up Stitches and Create the Sole
After completing your heel shaping, you’ll pick up stitches along the sides of your heel flap. This might seem intimidating at first, but it’s simply inserting your needle through existing stitches and pulling yarn through to create new loops. Pick up approximately one stitch for every row along each side of your heel flap. These new stitches create the foundation for your sole.
Step 5: Decrease to the Toe
Now comes the satisfying part—decreasing stitches to form the toe. You’ll work several rounds decreasing strategically at the sides and top of the foot. Most patterns have you decrease 4 stitches every other row until you have 8-12 stitches remaining. Watch your bootie take shape with each decrease. The fabric will naturally curl slightly around the toe area, creating a cozy pocket for tiny toes.
Step 6: Close the Toe
When you’ve decreased to your final stitches, cut your yarn leaving a 6-8 inch tail. Thread it through your remaining stitches using your yarn needle, pulling snug to close the toe completely. This is often called the Kitchener stitch or grafting. Pull firmly but gently—you want the toe closed without puckering.
Step 7: Weave in Ends and Block
Use your yarn needle to weave in all yarn ends, working them through nearby stitches so they won’t unravel with washing. For the finishing touch, block your booties gently. Fill a sink with lukewarm water and a tiny bit of wool wash, submerge your booties, and let them soak for 15 minutes. Gently squeeze out water (never wring), then lay flat on a towel to dry. Blocking helps even out stitches and gives your booties a professional appearance.
Finishing Touches and Customization
Once your booties are complete, consider personalization options. Embroidery adds character—a simple running stitch around the cuff or tiny flowers on the toe transforms basic booties into treasured heirlooms. Small buttons sewn securely to the sides create a decorative element (keep them far from baby’s mouth and ensure they’re completely secure).
Matching sets coordinate beautifully with other items in your baby’s wardrobe. If you’re making baby boy clothes or baby girl clothes in the same yarn, your handmade collection becomes cohesive and special. Consider knitting matching baby blanket sections using the same yarn and stitch patterns.
For gifts, include care instructions with your booties. Handmade baby items deserve proper care to maintain their beauty. Most wool and wool-blend booties should be hand-washed in cool water with gentle soap, then laid flat to dry. For acrylic booties, machine washing on a delicate cycle works fine, though hand-washing preserves the craftsmanship longer.
Think about gifting presentation. Wrap your booties in tissue paper with a small card explaining the yarn fiber content and care instructions. Include a note about the hours spent creating this gift—new parents will treasure knowing the love invested in each stitch. Consider pairing booties with baby walking shoes for a complete footwear gift set.
Common Mistakes and Troubleshooting
Dropped Stitches
It happens to every knitter—you accidentally drop a stitch and don’t notice until rows later. Don’t panic. Use a crochet hook to pick up that stitch, working it back up through the rows. Insert the hook through the dropped stitch from front to back, catch the horizontal strand of yarn above it, and pull through. Repeat for each row until you’ve recovered the stitch.
Uneven Tension
If your booties look lopsided or one side is tighter than the other, tension issues are likely culprits. Your hands might naturally tighten stitches differently on some rows. Practice maintaining consistent tension by holding your yarn the same way throughout. Some knitters wrap yarn around their pinky finger for better control, while others let it flow more loosely. Find what works for you and stick with it.
Gauge Problems
Your finished booties are too big or too small? Gauge discrepancies are the usual suspect. Check your swatch again—you might need smaller or larger needles. If your gauge was off, you can still salvage your project by adjusting decreases accordingly. Decrease more aggressively for oversized booties, or less for undersized ones.
Heel Shaping Confusion
Short rows confuse many knitters. Remember: you’re intentionally working only part of your stitches each row to create shaping. Keep your pattern right in front of you and follow it row by row. Mark completed rows with a stitch marker or pen. The heel section requires more attention than other parts, so don’t rush through it.
Seaming Problems
If your bootie pieces don’t fit together perfectly, your seams might be too tight or too loose. Use a yarn needle and work with the same yarn you knitted with. Keep seams loose enough to maintain stretch—baby booties need flexibility for growing feet. The mattress stitch creates nearly invisible seams and is worth learning for this project.
According to Parents Magazine, handmade baby items should always be checked for safety—ensure all embellishments are securely attached and appropriate for your baby’s age and development stage.
Frequently Asked Questions
How long does it take to knit baby booties?
Most knitters complete a pair of baby booties in 4-8 hours, depending on experience level and pattern complexity. Beginners might need 10-12 hours, while experienced knitters can finish in 3-4 hours. The actual time varies based on yarn thickness, stitch complexity, and how often you take breaks to rest your hands.
Can I knit baby booties if I’m a complete beginner?
Absolutely! Baby booties are actually an excellent beginner project. They’re small enough to manage without feeling overwhelming, and they teach fundamental techniques you’ll use in larger projects. Start with a simple pattern featuring basic stitches—look for patterns labeled “beginner-friendly” or “easy.” Resources like Craftsy offer free video tutorials that make learning much easier.
What yarn weight is best for baby booties?
Fingering weight and sport weight yarns are ideal for baby booties. These create a dense fabric that holds its shape well and wears beautifully. Bulky weight yarn works too but creates thicker, bulkier booties that might be too warm. DK weight is also suitable and offers a nice middle ground between delicate and substantial.
How do I know what size to make?
For newborns, aim for 3-4 inches long. For 3-6 months, make them 4-4.5 inches. For 6-12 months, 4.5-5 inches works well. If knitting for a specific baby, gently measure their foot from heel to toe. Always check your pattern’s finished measurements and adjust your gauge accordingly. Remember babies grow quickly—slightly loose booties worn over socks are more practical than snug ones.
Can I machine wash knitted baby booties?
It depends on your yarn fiber. Acrylic booties handle machine washing well on a delicate cycle. Wool and wool blends should be hand-washed in cool water with gentle wool soap, then laid flat to dry. Never use hot water or wring out wool booties—this causes felting and shrinking. Always check your specific yarn’s care instructions.
What if I make a mistake partway through?
Small mistakes in baby booties are often invisible once worn. If you notice an error immediately, you can unravel back to that point and reknit. For mistakes discovered later, consider if they’re truly noticeable. Most handmade items have character and slight imperfections that add authenticity. If it bothers you, unraveling and reknitting is always an option—that’s the beauty of knitting.
Can I customize the pattern?
Definitely! Once you understand the basic structure, you can modify patterns. Change stitch patterns in the main body, add decorative elements, or adjust sizing. Keep detailed notes of your modifications so you can recreate successful variations. The Ravelry community is fantastic for sharing modifications and getting feedback from other knitters.
How many booties should I make?
Most new parents appreciate at least two pairs of booties—one for wearing while the other is being washed. If you’re making a gift set, three pairs provides excellent variety. Some parents prefer having several pairs in different styles and weights for different seasons and occasions. Consider the baby’s age too; newborns wear booties more frequently than older infants.
Knitting baby booties is more than a craft project—it’s an act of love that creates lasting memories. The soft yarn sliding through your needles, the meditative rhythm of each stitch, the moment your booties finally take shape—these experiences transform a simple project into something deeply meaningful. Your handmade booties will be cherished long after your child outgrows them, perhaps even passed along to siblings or kept as precious keepsakes of early parenthood.
Whether you’re an experienced knitter seeking a satisfying small project or a beginner ready to learn, baby booties offer the perfect combination of achievable challenge and heartwarming results. Start today, and soon you’ll have beautiful, handmade booties ready to keep tiny toes warm and cozy.