How to Make Baby Shark Cake: Expert Tips for Creating an Unforgettable Birthday Treat
Creating a Baby Shark cake for your child’s birthday is more than just baking—it’s about crafting a magical moment they’ll remember forever. Whether your little one is obsessed with the viral song or loves all things ocean-themed, this underwater-inspired cake brings joy and excitement to any celebration. As parents, we understand that birthday cakes are centerpieces of joy, and making one yourself adds a personal touch that store-bought options simply cannot match.
This comprehensive guide walks you through every step of creating a stunning Baby Shark cake, from basic designs to advanced decorating techniques. You don’t need professional baking skills to succeed; with the right approach, patience, and creativity, any parent can produce a cake that will have their child’s eyes light up with delight. Let’s dive into the wonderful world of Baby Shark cake creation together.
Table of Contents
- Choosing Your Baby Shark Cake Design
- Essential Supplies and Ingredients
- Basic Cake Recipe and Baking
- Frosting Techniques for Ocean Vibes
- Decorating Your Shark Character
- Adding Underwater Elements
- Common Cake Decorating Mistakes
- Frequently Asked Questions
Choosing Your Baby Shark Cake Design
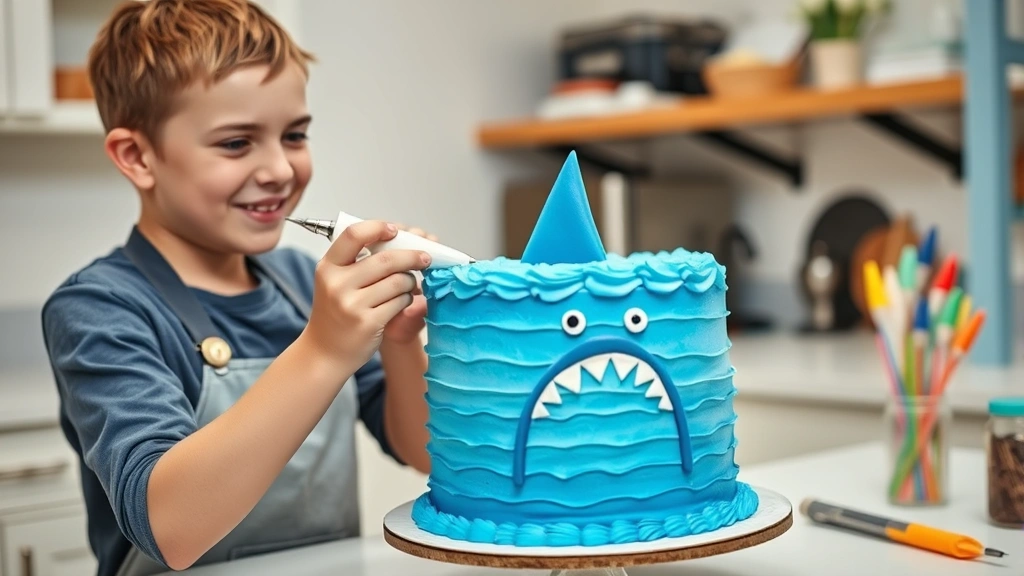
Before you start mixing ingredients, decide which Baby Shark design appeals to you most. The beauty of cake decorating is that you can customize it to match your child’s personality and your skill level. Popular designs include a simple shark head poking out of blue frosting waves, a full-body shark swimming through an ocean scene, or even a tiered cake with multiple sharks and underwater creatures.
Consider your celebration theme when selecting your design. If you’re hosting a full underwater party, a more elaborate ocean scene might be perfect. For smaller gatherings, a charming single-shark design works wonderfully. Think about your available time, oven space, and decorating confidence level. First-time cake decorators might prefer a simpler 2D shark design on a rectangular sheet cake, while experienced bakers can tackle 3D sculpted cakes or multi-tiered creations.
The best approach for busy parents is choosing a design that balances impressive appearance with manageable execution. Remember, your child cares more about the love you put into it than perfection.
Essential Supplies and Ingredients
Gathering your materials before you begin prevents mid-project scrambling and ensures smooth execution. Having everything organized and ready—what bakers call “mise en place”—sets you up for success.
Cake Ingredients
- 2 cups all-purpose flour
- 1½ teaspoons baking powder
- ½ teaspoon salt
- ½ cup butter, softened
- 1 cup granulated sugar
- 2 large eggs
- 1 teaspoon vanilla extract
- ¾ cup whole milk
- Blue food coloring (gel works best for vibrant colors)
Frosting Ingredients
- 1 pound powdered sugar
- ½ cup butter, softened
- 3-4 tablespoons milk
- 1 teaspoon vanilla extract
- Blue, gray, and white food coloring
Decorating Supplies
- Piping bags and assorted tips
- Offset spatula for smooth frosting
- Fondant in black, white, and gray (optional but helpful)
- Edible markers for details
- Candy eyes or fondant circles for eyes
- Toothpicks for sculpting
- Cake boards and turntable
- Parchment paper
- Measuring cups and spoons
If you’re planning multiple celebrations, consider investing in a quality cake decorating kit. For occasional use, basic tools are sufficient. Many parents find that investing in a few key tools pays dividends for future birthday cakes.
Basic Cake Recipe and Baking
Start with a reliable vanilla or chocolate cake recipe as your foundation. This simple vanilla cake serves as the perfect canvas for your Baby Shark masterpiece.
Step-by-Step Baking Instructions
- Preheat your oven to 350°F (175°C). Grease and flour two 8-inch round cake pans or one 9×13-inch rectangular pan.
- Mix dry ingredients in a bowl: flour, baking powder, and salt. Whisk together thoroughly to distribute leavening agents evenly.
- Cream butter and sugar together for 2-3 minutes until light and fluffy. This incorporates air into the batter, creating a lighter crumb.
- Add eggs one at a time, beating well after each addition. Add vanilla extract and mix until combined.
- Alternate adding dry ingredients and milk, beginning and ending with dry ingredients. Mix on low speed until just combined—overmixing develops gluten and creates tough cake.
- Divide batter and add blue food coloring to half if desired, creating an ombre effect or ocean-blue layers.
- Pour into prepared pans and smooth the tops. Bake for 25-30 minutes until a toothpick inserted in the center comes out clean.
- Cool in pans for 10 minutes, then turn out onto wire racks to cool completely before decorating.
Pro tip: Bake your cake the day before decorating. Cooled cake is easier to work with, and the crumb structure sets properly, preventing crumbling during frosting application.
Frosting Techniques for Ocean Vibes
Frosting is where your Baby Shark cake truly comes alive. The right frosting technique transforms a simple cake into an ocean scene worthy of celebration.
Making Swiss Meringue Buttercream
For a more professional finish, consider Swiss meringue buttercream instead of American buttercream. It’s less sweet and holds up better in warm weather. Beat egg whites and sugar over a double boiler until reaching 160°F (for food safety), then whip until stiff peaks form and gradually add softened butter.
Creating Ocean Waves
Use your offset spatula to create wavy patterns in your frosting. Apply frosting in horizontal strokes, varying the height slightly to mimic natural wave formations. Layer different shades of blue frosting—darker blue for deeper water, lighter blue for shallow areas, and white for foam and highlights.
A piping bag with a large open star tip creates beautiful wave textures. Pipe horizontal lines across your cake, overlapping slightly to build dimension. This technique, called piping rosettes, adds professional-looking texture without requiring advanced skills.
Color Mixing for Depth
Mix your frosting colors strategically. Start with white frosting and add blue gel coloring drop by drop until you achieve your desired shade. Create multiple shades: navy for deep water, sky blue for shallow areas, turquoise for tropical waters, and white for highlights and foam.

Decorating Your Shark Character
Now comes the fun part—bringing Baby Shark to life on your cake. Whether you choose a simple or elaborate design, these techniques ensure your shark looks adorable and recognizable.
Simple 2D Shark Design
For beginners, a 2D shark painted on the cake surface works beautifully. Use black edible marker or food coloring mixed with vodka to draw shark outlines. Add details like eyes, smile, and gill lines. This approach requires minimal sculpting skills while still creating an impressive result.
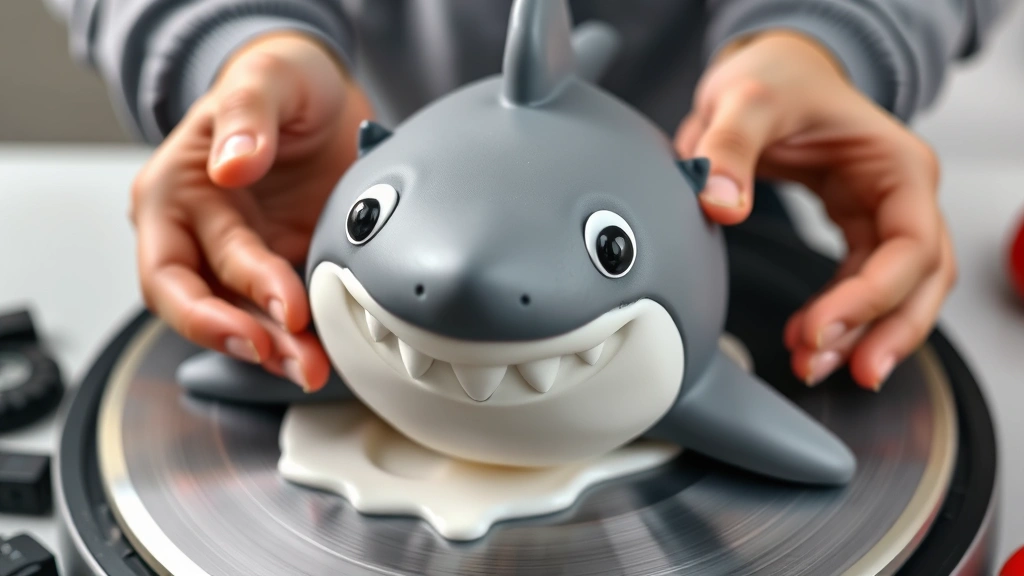
Fondant Shark Creation
Fondant offers more sculpting possibilities. Roll out gray or blue fondant and shape it into a shark body. Use your fingers to create a pointed snout, smooth the back into a fin shape, and add smaller fins along the sides. Attach fondant pieces using frosting as adhesive.
For shark eyes, use white fondant circles with black fondant pupils, or purchase edible candy eyes. Add a friendly smile with black edible marker. Baby Shark’s characteristic cheerful expression is key to making your cake instantly recognizable.
3D Shark Sculpting
Advanced decorators can carve a shark shape from a domed or shaped cake. Cut cake pieces strategically to create the shark’s body, head, and fin. Crumb coat with frosting, then apply your final frosting layer. This technique requires more cake, time, and confidence but produces stunning results.
Adding Underwater Elements
Transform your Baby Shark cake into a complete underwater scene with supporting elements that enhance the theme and delight your young celebrant.
Coral and Sea Plants
Use pink, orange, and purple frosting to pipe coral formations around your shark. Create branching patterns using a small round piping tip. Add green frosting “seaweed” with a grass tip for swaying ocean plants. These elements frame your shark and fill empty cake spaces beautifully.
Fish and Sea Creatures
Add small fondant or frosting fish in various colors swimming around Baby Shark. Create simple fish by piping oval bodies with tail fins. Add starfish by piping five-pointed stars in yellow or orange frosting. Include jellyfish with rounded tops and dangling tentacles for whimsical charm.
Bubbles and Water Effects
Pipe white frosting bubbles of varying sizes throughout the cake using round piping tips. Add pearl dust or edible glitter to frosting for a shimmering water effect. These finishing touches create depth and movement, making your ocean scene feel alive.
Personalization Elements
Add your child’s name and age using piped frosting, fondant letters, or edible markers. Include the celebration date or a special message. Personal touches transform the cake from beautiful to truly meaningful, showing your child how special they are to you.
Common Cake Decorating Mistakes and Solutions
Even experienced bakers encounter challenges. Understanding common issues and their solutions prevents frustration and ensures success.
Frosting Too Soft or Runny
If your frosting slides off the cake, it’s too warm or contains too much liquid. Refrigerate it for 15-20 minutes until it firms up. If it’s permanently too soft, add more powdered sugar gradually while mixing. Room temperature butter should be soft enough to leave a fingerprint impression but firm enough to hold shape.
Cake Layers Sliding
Prevent layer slippage by applying frosting to a cake board or plate first, creating a “glue” that anchors your bottom layer. Use dowel rods inserted vertically through stacked layers for support. This technique is especially important for taller cakes.
Dry or Dense Cake Crumb
This usually results from overbaking or overmixing batter. Use an oven thermometer to ensure accurate temperature, and mix batter only until ingredients are just combined. Don’t open the oven door during baking, as temperature fluctuations affect results.
Crumbs in Frosting
Apply a thin crumb coat first—a light frosting layer that seals crumbs—then refrigerate for 30 minutes before applying final frosting. This technique, called “crumb coating,” prevents cake pieces from mixing into your beautiful frosting finish.
Colors Too Dull or Muddy
Gel food coloring produces more vibrant results than liquid coloring. Add coloring gradually; you can always add more, but removing excess is difficult. Mix colors thoroughly to avoid streaking. Remember that frosting colors appear darker when wet and lighter when dry.
Frequently Asked Questions
How far in advance can I make a Baby Shark cake?
Bake unfrosted cake layers up to two days ahead; wrap them in plastic wrap and store at room temperature. Frosted cakes keep best in cool conditions for up to 24 hours. Complex decorations are best completed the day of the party to maintain freshness and color vibrancy.
Can I make a Baby Shark cake without fondant?
Absolutely! Frosting-only cakes look beautiful and taste better to many people. Use piping bags with various tips to create texture and details. Edible markers add fine details that frosting alone cannot achieve. Your cake doesn’t need fondant to be impressive.
What’s the best frosting for warm weather celebrations?
Swiss meringue buttercream or cream cheese frosting holds up better in heat than American buttercream. If serving outdoors, keep the cake in a shaded area and consider applying frosting closer to serving time. A cake box with ventilation helps maintain temperature.
How do I transport a decorated cake safely?
Place your cake on a sturdy cake board secured to a non-slip mat in your vehicle. Keep it away from heat vents and direct sunlight. Drive smoothly, avoiding sudden stops or sharp turns. If traveling far, consider transporting cake components separately and assembling at the venue.
Can I use a cake mix instead of baking from scratch?
Yes! Quality cake mixes produce excellent results. Follow package directions, but add an extra egg and substitute milk for water for richer flavor and texture. Add a teaspoon of vanilla extract for enhanced taste. Many professional bakers use quality mixes as their foundation.
What if my shark looks nothing like Baby Shark?
Remember that children have wonderful imaginations and appreciate effort more than perfection. Add a cheerful expression with big eyes and a smile, and most children will recognize it as their beloved Baby Shark. Consider providing context with decorative elements like the song title written on the cake.
How can I make my cake more interactive for kids?
Create edible “treasures” by hiding candy or small toys around the cake base. Arrange gummy fish and sea creatures on the cake board. Use colorful sprinkles and candies as decorative elements that guests can enjoy. Make the cake part of the entertainment, not just the dessert.
What’s the best way to serve a decorated cake?
Use a long, thin-bladed knife dipped in hot water and wiped clean between cuts for neat slices. Serve cake at room temperature for best flavor—remove from refrigeration 30 minutes before serving. Provide small plates and forks, and consider having napkins readily available for sticky fingers.
Creating a Baby Shark cake is a wonderful way to celebrate your child’s special day. Whether you’re a novice baker or experienced decorator, these expert tips and techniques help you create a cake that’s as delicious as it is delightful. Your effort, creativity, and love shine through in every bite, making this homemade cake infinitely more special than any store-bought option. Dive into cake decorating with confidence, knowing that your child will treasure the memory of the cake you made with them in mind.
For more celebration ideas and parenting tips, visit our comprehensive resource section. Whether you’re planning birthday parties, selecting special occasion outfits for boys or celebratory dresses for girls, we’re here to help make every moment memorable.